New Gear
Equipment
Sawmilling
Upping accuracy with your optimizer in the sawmill
Dec. 12, 2017 - The optimizer only knows what we tell it. Not only do we have to define all the product details (e.g. thickness, width, length, grade, etc.) we also have to define all the mechanical parameters.
December 12, 2017 By Sheldon Ong & Billy Freeman
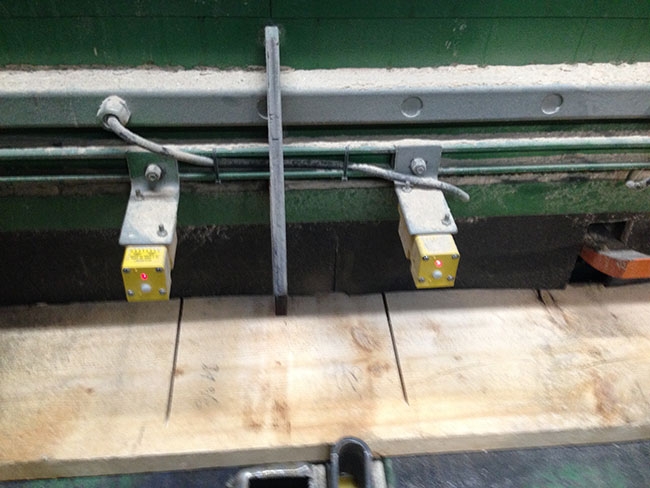
 A completed storyboard is stopped directly below the trimmer photoeyes. The optimizer only knows what we tell it.
If a fence position or a specific saw combination is not defined in the optimizer, then it will not be used to make a solution. As you can imagine, the accuracy of the mechanical parameters is crucial for proper optimization. To gain a better understanding of how to manage the mechanical parameters of an optimizer, we will begin by focusing on the process of making a storyboard and how it is used to determine the saw positioning in a trim box.
What is a storyboard?
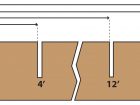
A storyboard is essentially a board that tells the location (story) of the saw positions in the trim box. In particular, a storyboard is a full-length board that has been passed partially into the trimmer saws while all the saws are running and forced in the “down” position; resulting in sawcuts at each saw location (Figure 1). This process is more accurate than measuring the physical saws using a tape measure and is what Autolog recommends for determining accurate saw positioning.
How to make a storyboard
Depending on your control system, you will have to find a way to make partial sawcuts in a board without slashing the entire piece. With the newest release of the Autolog control system, we have created a feature to automatically create a storyboard. This allows mills to make a storyboard in a timely manner.
How to properly measure saw positioning using the storyboard
The distances are measured from the inside of the zero saw to the inside of each sawcut. A saw before the zero saw (negative saw) has a negative distance and it is measured from the same zero saw reference to the inside of the negative saw.
How to use the storyboard to measure the default trimming on the zero saw
This parameter defines the default trimming on the zero saw, when there is no fence or trim command; and is considered in the optimization process. This distance is measured from the near end of the board to the inside of the zero saw (default trim = wafer + saw kerf). Use the storyboard to accurately get this distance.
What if the storyboard measurements are different from the optimizer’s parameters?
If the storyboard measurements are not identical to the optimizer saw positions and the default trimming of the zero saw, then there will be lost optimization opportunity (equals lost money).
Example 1: The optimizer’s saw position is less than the actual saw position.
- Optimizer’s position = 120.5”
- Actual position = 121.5”
- If we have an input board that is 124” long and there is a defect on the near end that requires 3” of trimming then the far end will be left untrimmed (124”- 3”= 121”, 121”< 121.5”).
Example 2: The optimizer’s saw position is greater than the actual saw position.
- Optimizer’s position = 121.5”
- Actual position = 120.5”
- If an input board is measured less than 121.5” then it will be trimmed back to the next longest length, even though the piece could be made between the actual saw spacing.
How to adjust trimmer presence photoeyes and length confirmation photoeyes using the storyboard
Most mills have photoeyes before and after the trimmer for each individual saw in order to determine the board’s presence at each saw location and to verify the length of the board after it has been trimmed. Once a storyboard has been made, rerun the storyboard and stop it directly under the photoeyes. The presence photoeyes should be aligned somewhere within the saw cuts (inside edge, centre or outside edge). It is critical that these presence photoeyes are set properly, to avoid unnecessary trimloss or untrimmed ends. The length confirmation photoeyes should be set a couple inches inside each saw.
Are storyboards required for movable saws (precision end trim)?
Since movable saws are constantly verified and adjusted throughout a production shift in order to ensure a precision end trim product (PET), it is not necessary to make a storyboard for verifying saw positions. But, it is still necessary to check the default trimming on zero saw (0’ saw position relative to the 0’ fence) and enter this value in the optimizer. Also it’s still necessary to properly set the photoeyes.
How can this be managed better?
Saws and other trim box components (saw arms, shims, cylinders, belts, guides, etc.) are changed relatively frequently. Therefore, it can be assumed that the positions of the saws are going to be altered slightly on a regular basis. To manage these frequent saw position changes, Autolog recommends the following:
- Complete a storyboard after every saw change (at the very least, once a month).
- If the measured saw positions are different than the optimizer’s, then change the values in the optimizer to represent reality (if the new positions make all the necessary saw combinations). If the new saw positions do not make all the necessary saw combinations, then the saw(s) must be moved, and another storyboard must be performed to confirm the new locations.
- Verify the trimmer presence and length confirmation photoeye positions using the newly made storyboard. Adjust all photoeyes accordingly.
It is difficult to determine exactly how much impact a difference between optimizer saw positions, actual saw positions and photoeye positions have on production. But, we can tell you that the impact is real. Our team at Autolog will gladly help you complete the storyboard process, but continual verification from mill personnel will be required in order to reap all the benefits. This can be either easy money gained or easy money lost, but that will be up to your mill to decide.
Sheldon Ong is a member of the Process Expert Group for Autolog.
Billy Freeman is a former member of the Process Expert Group for Autolog and now in process improvement at Harry Freeman and Son Ltd. in Greenfield, N.S.
Print this page

